Wednesday, January 23, 2008

Light 6: Electronic Flash

Now, lets talk about the killer of photography.

In the good old days, even amateur photographers used to take their subjects near the window or a source of light, or else put their cameras on tripod. Simply to get a shot with a reasonably good light. But now? what do we do? Switch the flash on, and click! To hell with light, to darn with shadows!
But there's one thing we are forgetting here. "Our eyes rely on shadows to recognize shapes." There is no useful shadow cues if the light source and the lens is coming from the same angle. So guys, don't point and shoot without thinking, or else you have to be happy with the "deer in the spotlight" look of your photo.
So does that mean you have to throw away the flash that came with your camera, or never use it? No! Remember the fill flash? It serves really well to minimize dark shadows in harsh sunlight. And not only that, accessory flash can be a useful tool, if used correctly. There's an array of strategies to use flash effectively.

Strategy 1: Get the flash off-camera.
Modern DSLRs provides the option of using a separate flash not attached directly on the camera. Even if you do not own a DSLR, never worry... buy an Flash bracket, which holds the flash on to the side of the camera, instead of the usual "top-of-the lens".

Strategy 2: Bounce flash
Another good option is to get a dual flash. In this case, the main flash fires to the ceiling. Creating an illusion of light coming from the top. And a second low-power flash fires straight ahead to compensate the dark shadows forming otherwise.

Strategy 3: Attach a diffuser
Diffusers are small translucent plastic cubes, that fits on to the flash head to diffuse the harsh light coming from it. Diffusers really play their part well in creating a soft light, but they waste too much of light, causing the range of the flash to diminish considerably.

Flash cool tip: wrap a colored cellophane sheet onto the flash to get some tint on your photos, if you want them to be cooler, use blue, yellow for a golden light, and red for a warm tint!

Monday, January 21, 2008

Light 5: Artificial Lights

Ok, the sun has gone down now. It is dark. no twilight or afterglow is left, the sky is pitch black.
So? Is it finally time to call it a day? No, my friend, not yet. You still have lights. Not natural, artificial they may be, but still, LIGHTS!

Street lights: It is very difficult to ascertain the color temperature of street lights, They emit in various narrow spectral bands. And these bands produce very unpredictable results on digital sensors or films. But still, I have seen, Tungsten films sometimes produce good results, so does "Tungsten" white balance in digicams. But sometimes they give an eerie greenish light to the shot, which again, I am personally very fond of.


Indoor Light- Fluorescent: Fluorescent lights emit diffused lights. Quite well-suited for B/W photography. But in case of color photography, use a "fluorescent -> daylight" (FL-D) filter over the lens in an attempt to compensate, in case of a film camera, and Turn the white balance to "Fluorescent", in case of Digitals. The light is quite low too, so use exposures of f/2.8 and 1/15th of shutter speed.


Indoor Light- Incandescent: The light bulbs are much warmer than the daylight, throwing a loud yellow cast over the shot, which, can be compensated by a blue filter over the lens. Again, in case of digitals, tweak the white balance to "Incandescent".


Artificial Lights cool tip: Take lots and lots of photos, until you yourself are not satisfied with the results! ;)

Next post: flash

Friday, December 21, 2007

Light 4: Twilight

You have taken lots of pictures during the day. You have shot from sunrise to sunset. And now that the sun has gone down, you say to yourself, "Well, my friend, you had good day, now that the sun is away for the next day, I won't be getting good shots. So, let's call it a day!"

Wrong my friend, wrong! This is the time to shoot some of the most remarkable shots of your life. Because, you are just in the Twilight zone. This the rare time of the day, when the street lights are on, and the sky is not altogether pitch black. Now the sky is indigo, and the buildings are golden with artificial light. Remember, 20-40 minutes past sunset, is the best, and possibly only time to shoot the violet-indigo sky.

India gate, illuminated : Delhi

For this you will need a tripod, to keep the camera rock-steady. Because, in the twilight photography, the exposures are long. If you use 100 ISO film, they can be as long as 4 seconds 
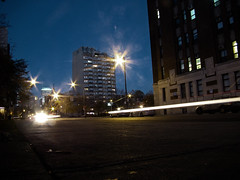
with f/11 aperture. At this long an exposure, you can never hold the camera in your hand, you'll get shaky pictures. So, tripod is a must.

The long exposure comes with some added benefits too. If you are shooting by the road, you will get light trails from cars passing by. Sometimes the lights look like streaks, sometimes they resemble comets. And if you are shooting by the sea? The waves will look like ghostly mist!

Cool Twilight tip: Try to get a low-angle shot. While positioning the camera, set it up at around one foot high from the ground. This low-angle will add to the drama of the shot.

Friday, December 14, 2007

Light 3: Overcast Skylight.

Every time we are shooting in the sunlight, the bright sun offers us huge amount of natural light as well as harsh shadows. If you are taking the advantage of the free bright light, you have to take the shadows as well. It's a package deal. The fill-in flash cannot always minimize the effect too.

Here comes the natural solution for harsh shadows: OVERCAST SKYLIGHT

Best overcast skylights are available on those days when the sun is high and the sky is covered with pale grey clouds. Those days, you will never have to bring out your flash to hide the dark shadow patches. Beautiful portraits: simply, naturally! This soft light not only helps to create brilliant portraits, but capturing minute architectural details also.

An angel representing commerce.

Overcast or rainy days are great to capture nature also. Go out to the garden, have a splish-splash, shoot the brilliant colors of nature saturated to optimum. This is the time when grass is at its greenest, and the dandelion is at its yellowest.


This "mother of all softboxes" is not without problems, though. Too much of sky in your pictures may look boring, how much exceptional they may be. So, try to include as little sky as possible in your shots.

Victoria Memorial, Kolkata
This shot, although came out nicely, is a bit boring because of the flat white sky.


OVERCAST COOL TIP: Overcast skies are slightly more "blue" than normal skies. So if you are using a film camera with normal daylight film, use an 81C warming filter. And if you are a digital camera user, simply turn the "white balance" to cloudy.

Saturday, December 8, 2007

Light 2: Portraits in sunlight.

You have gone to visit a nice museum with your girlfriend; you have clicked some photo inside. But outside, there is a piece of nice architecture, which you want to shoot with your fiancée beside it. No problem, you take out your camera, ask her to stand beside it, and click you go. You are really happy that the shot has turned out great.

After you’ve come back, you look at the enlargement of the shot, and your girl friend has dark ugly shadows beneath her eyes and nose and chin. Something like this one:

But you have nothing to do now, than to cry in desperation “Why me?” and bang your fists on the desk.

Relax; it is a common problem, not with you alone. Professionals deal with this by bringing out large diffusers. But to us amateurs, it is but a ridiculous and impossible option to carry huge white screens on our shoulders.

Our option is the flash. Many will find it difficult to believe that firing the flash is required even in daylight, when there is so much of natural light, but the flash is really helpful to cut off those unwanted shadows beneath the eye, chin, etc. The flash is filling up the shadows, right? That’s why we call it “fill flash”.

Not only flash fills up the shadows, it adds a glint of light to eyes of the subject. The light is called “catchlight”. It makes the eyes of the subject much livelier and the portrait more interesting.


Another good option can be to wait for near sunrise or sunset, if you have ample time.
Because just as in the case of landscapes, low sun creates flattering warm glow, as well as interesting shadows.


PORTRAIT COOL TIP: Try to avoid firing the flash when shooting portraits in sunset or sunrise. This time the light is red and warm, the bluish light of flash can make the portraits look unnaturally cold.

Next post: OVERCAST SKYLIGHT

Saturday, December 1, 2007

Light 1: Landscapes in sunlight.

"LIGHTS...CAMERA...ACTION!!"

Light is the most important factor in art of photography.

Photography literally means, “To write with light”. But which light? Not any, as different type of light is required to shoot different subjects. Choosing the right light can run or ruin your shot.


First we will discuss the light which started the photographic history, and is completely free of cost. Sunlight.

You can get a lot of light from that ball of burning gas; however, you’ll have to get a bit tricky to get the best light needed for your shot.

In this post, we will learn how to use sunlight for shooting landscapes.

Landscapes come out in their best shape in sunlight. However, overhead sunlight can be more damaging to the beauty of a landscape than enhancing it. Our eyes, being accustomed to rely on shadows for the sense of depth, finds a landscape rather "flat" in the mid-day due to the short shadows casted by the overhead sun.

It is always better to shoot the landscape in the morning or late afternoon, when the sun is casting long shadows. In fact, sunset provides a warm golden light over the terrain, which I prefer for the Landscapes, over the morning pink light.

Nonetheless, it is possible to get a reasonably good photograph in the mid-day light, if the subject is compelling enough, and you are looking for descriptive shots like those found in a travel brochure.


LANDSCAPE COOL TIP: Always look for some clouds in the sky. Cloudless skies appear dull and uninteresting. If you don’t get clouds, try to keep as little sky in the frame as possible.

Next post- Portraits in Sunlight.

Sunday, November 25, 2007

A short history and types of photography.

Now, enough of chats and talking, lets get down to some serious business.

Photography, an art of recording light on light-sensitive medium (a film or a sensor), began some 1000 years ago. From then, art of photography has come a long way.
Now it can be said that photography can be of three main types.
1) Monochrome or Black and white Photography
2) Color Photography
3) Digital Photography.

Among these, Black and white Photography was the earliest form to arrive and still is the favorite form of photography for some artistic photographers for its "classic" look.


Color photography
arrived in the 1860's and captured the market for its ability to capture the vibrant colors of nature (and the man-made colors too). Manufacturers like Agfa, Kodak and Fuji dominated the market of color films. And also, color films can be positive too. These are called transparencies or slide films, and are used in a slide projector mainly.
With the advent of technology, traditional photojournalists were put to strong competition from television on delivering images fast enough, especially when working in a remote location. In 1990, Kodak introduced the first digital camera DCS 100, and with it Digital photography was born.

Digital cameras use an electronic image sensor to record the image instead of a film.
Digital photography has become so popular that giants like Nikon and Canon has announced that they will stop producing film SLR cameras from 2005 and 2006 respectively.


But whether it is film or digital, the basic techniques like composition, exposure, etc remains the same. The techniques which we will begin to learn from the next post.

Before we part, here is a list of different forms of photography:

* Architectural photography
* Candid photography
* Cloudscape photography
* Documentary photography
* Fashion photography
* Fine art photography
* Forensic photography
* Food photography
* Glamour photography
* Landscape art
* Macro photography
* Nature photography
* Photojournalism
* Portrait photography
* Sports photography
* Still life photography
* Stock photography
* Street photography
* Travel photography
* Wildlife photography

Amongst these, we will learn and discuss every form individually, except Forensic photography, about which I have no idea.

But guys, before we go into the different forms, let’s learn the basics.
In the next post, we will discuss the most important factor of Photography- LIGHT.